

THE BLOG

TINY TIDY: Pick A Drawer, ANY Drawer...
I just want to state again that the entire concept of these little Tiny Tidys, and the "Home" aspect of House & Mind, is to allow for the realization that not only is the idea of perfection not desirable, it's not even an option. It simply doesn't EXIST. (Phew!)…
I just want to state again that the entire concept of these little Tiny Tidys, and the "Home" aspect of House & Mind, is to allow for the realization that not only is the idea of perfection not desirable, it's not even an option. It simply doesn't EXIST. (Phew!) By keeping your home clean and organized at YOUR level and your own pace, you will find your life to become endlessly more satisfying and just...feeling a bit more together. It's really true! I promise. If you are happy with things a little messier, and it keeps your life and more richer and more creative, keep it that way! If it's messy, and your life is out of hand, and you feel perennially on the run, chasing after things and out-of- control, maybe start a little slower, but take a stab at cleaning things up. That is what these TINY TIDYS are for, and with THAT in mind-I'd like you now to...Pick a drawer in your bedroom, kid's room kitchen or bathroom...ANY drawer!
Get READY...
Gather up: A rag and your fave natural cleanser.
Place a towel on your bed or nearby counter.
Find & gather up the bottom of some smaller, empty boxes-think iPhone old boxes, shoe boxes, stationary boxes, so you have some different width, depth and length options.
Walk around your home, and figure out which drawer you are going to focus on. Do NOT over think this, please! I mean it! Just pick ONE drawer.
Once you have figured it out, take everything OUT of the drawer (just do it!) and put it on the towel-covered bed, or counter-top.
Spritz the drawer lightly with cleanser, and dust it off/clean the drawer off.
When you are done physically cleaning the drawer, turn and look at your stuff you have place on the counter...
It's probably a jumbled mess. That is okay!
Basically-THIS part is the "real" juicy part of this process-NOT how you are going to reorganize all of this crap. I know your throat may be clenching up and your heart could be racing-what with looking at what could possibly be a real mess. But it's alright. Take it easy.
If this is a junk drawer you are doing, start tossing! Recycle or put in the give-away bag ANY old cords or random things hanging around...Just be ruthless. The stuff has been sitting in there, most likely, forever.
If you are doing, say, a lingerie drawer, inspect each and every article of clothing. Get rid of or put in a give away bag ANY thing you do not like, looks worn to you, or somehow, gives you the shivers. Do this quickly.
Depending on if you have clothing, accessories or junk drawer items. start looking at your new organizing system-those boxes and lids! Place some in the empty drawer. Start putting things back in the boxes, in a way that you'd really like them to be from now on. Play around with them. The lids are excellent to use for this, and act as little trays. I use them EVERYWHERE. They organize toiletries and junk drawer things really beautifully.
Futz around until you feel that "click," and get the drawer the way you like it.
YAY! LOOK at how easy that was- Congrats! You just tidied a random drawer in no time! #itsthelittlethings :)
These boxes and lids have been my main take away from that whole Kondo-craze- the lovely idea that you do NOT spend more money on more stuff to organize, just use the stuff you have!
I really do love that. If you feel like it, KEEP going! (Ha! My little strategy today, to be honest.)
And have a great weekend! xo

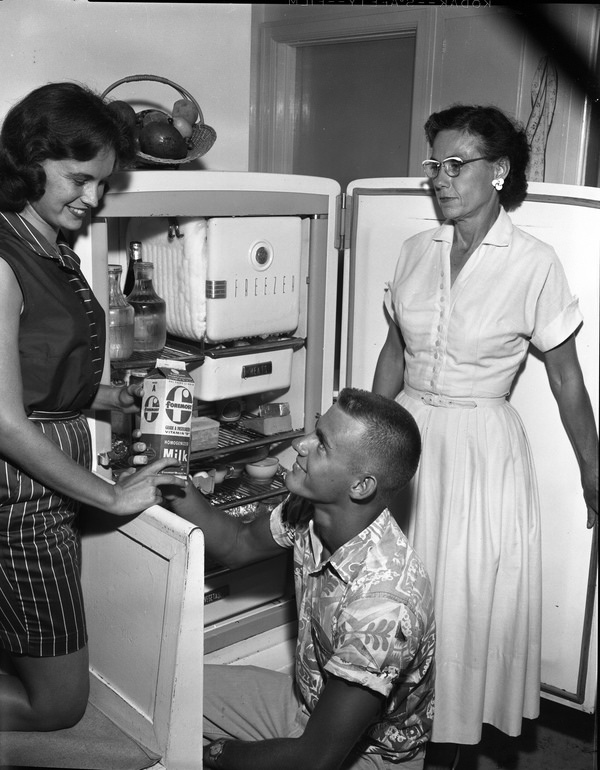
Tiny Tidy: Your Fridge (Ugh!)
I know, this one is not so "tiny." In fact, the electricity went out in my apartment for about six hours when I wasn't home this week. I literally had to throw practically everything went, as, I found out the hard way, a few things spoiled! Ick.
(It's a pain to do this one. I totally get it.)
But! Summer is sadly, soon, coming to an end. You have had probably had more fresh fruit and produce in the fridge than usual. Now is a great time to get rid of these old left-overs, condiments that have seen better days, and, well, YOU know! All that good (and gross!) fridge stuff. You CAN do this in 45 minutes or less. It's just going to take a little bit of planning…
I know, this one is not so "tiny." In fact, the electricity went out in my apartment for about six hours when I wasn't home this week. I literally had to throw practically everything went, as, I found out the hard way, a few things spoiled! Ick.
(It's a pain to do this one. I totally get it.)
But! Summer is sadly, soon, coming to an end. You have had probably had more fresh fruit and produce in the fridge than usual. Now is a great time to get rid of these old left-overs, condiments that have seen better days, and, well, YOU know! All that good (and gross!) fridge stuff. You CAN do this in 45 minutes or less. It's just going to take a little bit of planning:
So, let's GO! (get excited):
Plan on tossing and cleaning out food items and produce that are old, expired and, well, just done and over. You will want to rinse and keep, or rinse and recycle (please) plastic containers and glass jars, if at all possible. Have a recycle bag ready and waiting, and please make sure your sink is clean and ready. We will be dumping the old stuff and containers and expired condiments in there, first!
Start by getting: A sponge (or even better-Magic Eraser) your favorite natural cleanser, a rag, a bag for recycling containers, and a little note pad and pen.
Okay. Get ready! Open up that fridge.
Take a look in there. What is going ON, honestly? Take a really good look.
Now, start going through the obvious first-the shelves that are in view.
Go shelf buy shelf.
Put the "keep" items on the counter.
Place what you are tossing in the sink, just for now.
Now, you can choose to either wipe down the shelves as you go, using your sponge or Magic Eraser for the really gunge-y parts, or wait and wipe down all at once. Your choice!
Now-hit the side door shelves-the egg and butter compartments. Be thorough.
LOOK at those condiments. If the date has been scratched off check them out, but my guess is, they may have to go. Things like Apple Cider Vinegar, however, which I like to keep in the fridge. Just use your best judgement. (And your nose. ;)
Start making a list of what you want/need to replace, or even add. Here a few, healthy swap-out ideas: Coconut Aminos (you can buy at Trader Joe's.) in place of soy sauce. Plain Greek yogurt instead of sour cream; Any "organic" varieties of things like ketchup, jam and almond or peanut butter are just great. (Trader Joe's also has some wonderful and expensive options. Often their organic products are cheaper than "regular" items in a mainstream grocery store.) We are not an affiliate of TJs, by the way! Just enormous fans.
Okay. NOW-hit the veggie and fruit drawers. (I know. I feel you. Believe me.)
Throw the produce up on the counter.
Take a look. Can you cook/freeze/prepare any of it that is about to spoil? Plan on doing so now. You can throw veggies that are about to turn in an omelette or frittatas, make a quick salad. or even compose a strangely delicious new smoothie combination.
OKay! Hit those drawers. Pull them out real quick. Clean them as best you can. (You can do this!) I know, it's almost the worst. Just do it, though! You will feel lots better when it is DONE.
Now, take a break. (Just for a minute, though.)
Wipe down anything little spots you missed. (They are there!)
Now, look at the stuff on the counter. Start starting/tossing/recycling "old" food and condiments you have placed in the sink. Clean out the containers if you can-to clean and save, or to recycle. It is SO tempting to be lazy and skip this step. DON'T DO THAT.
Put everything back- all the food items, produce, condiments-that you plan on keeping.
Extra points if you want throw the lunch meat in an open plastic container to organize it better, or arrange the healthy foods shelf by shelf, so they are more accessible. You can be as cute as want. Roommates and family member swill have to deal. YOU CLEANED IT OUT! So there. Take that, bossy whoever.
AND YAY! YOU JUST CLEANED OUT YOUR FRIDGE! Now-it's time for a little treat! Whatever that means to you...Or, you can choose to cook a nice meal for yourself, your sweetie or your kids, with what you didn't know was still good, fresh and lurking in that fridge of yours...
Have a good one! xo

Spring Cleaning Start: Weekend Two!
We are on to Weekend #2 of our Spring Clean Guide. How was last week for you? Was it too much, or not quite enough? Please, do let us know below! Now, we are going to kick off this weekend with a few "big" tasks, sprinkled in with some truly smaller, more "fun" ones. Okay, ready or not! Here we go...(And again, please feel free to start Friday night, if you wish!)
We are on to Weekend #2 of our Spring Clean Guide. How was last week for you? Too much, or not quite enough? Well...
Now, we are going to kick off this weekend with a few "big" tasks, sprinkled in with some truly smaller, more "fun" ones. Okay, ready or not! Here we go...(And again, please feel free to start Friday night, if you wish)
Weekend #2 of the Spring Clean Start:
This weekend, we are going to focus on two BIG things: The walls, and the bathroom!
(I know.)
Now that you hopefully lightly dusted and de-cobwebbed your walls last weekend, grab a magic eraser, dampen it, and go around rubbing out any scuffs or little marks that you can manage from your walls.
Get a chair ready, take a rag or micro-fiber cloth, spritz on your fave natural cleanser, and get to work! Start at the top, and work your way down. Remember the endless moves he had to do in The Karate Kid? Just go in sweeping motions, like you are waxing or drying off your car.
Next, take care of any spots or true wall marks that cannot be buffed out. I keep a bright white tube of acrylic paint in a drawer, and daub any "real" marks.
Take a little break. Go for a walk. Meet a friend or take your partner out for lunch or coffee. Deal with your kids, and tell them you need a little "me" time. (Or ask your kids to help!) Just take a little rest!
Next, we are going to tackle your bathroom(s)! Ugh. I know. It is my least favorite room to clean, by far. So, to make it FUN...
We are going to make "Doo" Drops! I'm dead serious. And NO, I confess, I am not really a DIY person, but these drops are so fun, silly, and easy to make that it seems silly not to do this when cleaning out the dreaded bathroom! Just take a small glass or plastic bottle (preferably one that has a dropper, but that is not necessary) and pour about 2:1 in parts (depending on the size of your bottle) cheap vodka or rubbing alcohol/ to liquid hand or dish soap. Then, add about five drops of your fave essential oil, shake that baby up, et voila, instant "DO before you DOO!" Drops! (The bright idea is that you or a guest shake out a few drops into the toilet before they go number deux. The oil makes a coating on top of the water that traps odors.) Trust me, It's genius, and it WORKS! You can even grab a colorful marker, but off some brown paper from a grocery bag, and make a cute label. Done! (You are now a DIY genius.)
Next! Here we go: Take out everything on the sides of the tub, top of sink and vanity, and around and in the shower. That would be the shampoo and conditioner bottles, soaps, bubble bath and salts- you name it. Just put it in the hallway for now, even. What we want is a clean surface so we can get in and out of there, as easy and fast and possible. Remove everything from the top and around your toilet, as well.
Start with the toilet, in fact. I prefer using Bon Ami powder, which is a safe, gentle-yet-abrasive cleanser, which is also very inexpensive. Oxi Clean packets are also great to toss in and let dissolve, and they smell divine. Next, get out your toilet brush and scrub away! Take a rag and your fave natural cleanser, and scrub the top and sides of the toilet. GENIUS TIP: Take one or two DENTURE CLEANSING tablets as a safer alternative to those nasty blue pods. (Yes!) Grab some cheap ones at the Dollar Store. I'm serious! They leave a nice fizz, actually safely clean porcelan, and give a nice finish.
Your tub/shower: Bon Ami your tub, after first rinsing it with warm water from the shower, and pull up any stray grossness with a rag or paper towel. Spray and wipe the tile and surrounding walls.
Wipe down the sides and "walls" of the tub, as well, down to the floor.
Finish off the tub with a white vinegar/warm water rinse, to de-germ for real. (You can also add a few drop of your fave essential oil to the vinegar mix, if you'd like.)
Clean the mirrors, sink and vanity.
Wipe down all of the shampoo and shower gel bottles, skin care, whatever was resting around the tub and vanity, and put it all back.
Fun job: Run down to the drug store and buy a sack of scented Epsom salts, (lavender or eucalyptus!) and decant them in a pretty jar, popping it next to your tub. Super inexpensive, and a pretty little treat for you and your tub.
Run some hot water, and take a nice, long bath! You deserve it!!!
Have a great rest of your weekend...! xo


Join us weekly as we tackle what's weighing us down, lifting us up, and getting us moving-both at home and in the every day...
This is either quite a tragic task for you, or very easy, depending on how many people are using the linen closet, how many family members you have, and how large your home is, bedroom & bathroom-wise. Get ready to turn some old sheets and towels into something more useful, and let’s get BUSY…